

The best small-bedroom storage setup keeps a red light therapy panel vertical, protected, ventilated, easy to reach, and out of the walking path.
Is your red light therapy panel leaning against the bed frame, half-blocking a drawer, or making your room feel tighter than it already is? A good storage setup can save about the same floor space as a nightstand while making 10- to 20-minute sessions easier to do consistently. Here’s how to choose a no-floor-space storage method that protects the device and keeps your routine simple.
Start With the Panel’s Real Use Zone

A red light therapy panel is not just something you store; it is something you repeatedly position near your body. Most at-home panel routines are built around short, repeated sessions, and several consumer and clinical discussions describe typical use as about 10 to 20 minutes per session, often multiple times per week. That matters because the best storage spot is close to the place where you actually stand or sit.
Red light therapy, also called photobiomodulation, uses red and near-infrared light to interact with tissue. A science-focused product review describes photobiomodulation as a noninvasive light-based approach, while noting that dosing and device quality still vary. For small bedrooms, this means your storage decision should support consistent, controlled use instead of turning every session into a furniture-moving project.
A simple test is to stand where you would treat your face, chest, back, legs, or shoulders and measure the clear space between your body and the panel location. Many home panel protocols use roughly 6 to 12 inches from the body, though the correct distance depends on the specific device. If your wall-mounted storage spot lets you step back, set a timer, and avoid bumping furniture, it is likely better than a hidden location that requires setup every time.
Best No-Floor-Space Storage Options

Wall-Mount the Panel Where You Use It
Wall mounting is usually the cleanest solution for a small bedroom because the panel becomes both storage and treatment station. The main advantage is consistency: the height, angle, cord route, and distance stay the same. The downside is that it requires careful installation, and renters may need permission or a nonpermanent mounting approach.
Choose a wall section near an outlet, away from bedding, curtains, mirrors, and direct sunlight. A setup-focused panel article emphasizes mounting near ventilation and power, then testing the output after installation; that same logic applies even in a bedroom because airflow, stability, and safe access all affect daily use. In a 10-by-10-foot bedroom, a narrow wall beside a closet or dresser often works better than the wall behind the bed because you can stand in front of it without shining directly across your pillow or into a partner’s eyes.
For installation, match the mounting hardware to the panel weight and wall type. If the panel comes with a bracket, use that first instead of improvising. When studs are not available, use properly rated anchors, but avoid hanging a heavy full-body panel from drywall alone. Leave a few inches of breathing room around vents and fans so heat can disperse during use.
Use the Back of a Solid Door Carefully
An over-door or door-mounted setup can work when wall space is limited, especially for smaller and midsize panels. The benefit is obvious: the panel uses a vertical surface that usually sits empty. The tradeoff is movement. Doors swing, slam, flex, and get bumped, so this method is best for lighter panels and low-traffic doors, not heavy full-body units.
Before using a door, check three things in real life. The door should close without crushing the cord, the panel should not hit the wall or furniture when the door opens, and the light should not face a mirror or sleeping area. If the panel is used while hanging on the door, stand so the door cannot move during the session. A doorstop or hinge-side placement can reduce motion, but a fixed wall bracket is still more stable.
This approach is most practical when your panel is roughly the size of a tall backpack rather than a full-body tower. If the panel feels awkward to lift with one hand, treat the door as storage only after confirming the mount is rated for that weight.
Store It Vertically Inside a Closet
A closet-wall mount or vertical closet shelf is often the best compromise for renters. The panel stays off the floor, protected from sunlight, and hidden when not in use. The drawback is that you may need to remove it for treatment unless the closet has enough clearance and airflow.
Device choice matters here. Medical guidance notes that home red light devices come in several formats, including panels, face masks, caps, beds, and wands, and that the device should match the intended treatment area. For a bedroom closet, devices with a smaller treatment area are much easier to store vertically than large full-body panels.
A practical closet setup uses a mounted bracket on the side wall, a soft spacer behind the panel, and a dedicated pouch or bin for goggles, remote, and cable. Do not stack heavy shoes, storage cubes, or folded blankets against the LEDs. If the closet is humid because it shares space with laundry or a bathroom, choose another location.
Use a High Shelf Only for Storage, Not Treatment
A high shelf can work for storage if the panel is small enough to lift safely and the shelf is deep enough to prevent tipping. It should not become the treatment position unless the panel is designed for that angle and height. Panels positioned too high often shine at the face or eyes instead of the intended body area.
The better shelf method is vertical storage with a front lip, side support, and cable stored loosely beside the unit. Avoid wrapping the cord tightly around the panel because repeated bending near the plug can weaken the cable. If you need a step stool every time, the setup may look tidy but fail in practice because it adds friction to each session.
Compare the Storage Choices

Storage method |
Best for |
Main advantage |
Main caution |
Wall mount |
Regular panel users |
Fastest daily setup |
Must be securely installed |
Door mount |
Lightweight panels |
Uses unused vertical space |
Door movement can stress hardware |
Closet wall |
Hidden and protected |
May require setup before use |
|
High shelf |
Occasional use |
Keeps panel out of sight |
Lifting and tipping risk |
Protect the Panel While Saving Space

Storage should protect the optical surface, electronics, vents, and cord. Dust, oils, makeup, and smudges can interfere with the light path, especially on devices used close to the skin. A face-mask care article gives the same basic care principle for LED devices: clean after use and store in a cool, dry place. That advice transfers well to panels because storing in a cool, dry place helps protect light output and materials.
Let the panel cool before putting it away. Wipe exterior surfaces only as the manufacturer allows, and never spray cleaner directly onto LEDs, vents, switches, or ports. In a small bedroom, avoid sunny windowsills, shelves near radiators, damp closets beside bathrooms, and tight fabric covers that trap heat or moisture.
Cord management is part of storage, not decoration. Route the power cable along the wall edge with removable clips, keeping it out of walking paths and away from bed legs or drawer tracks. If the cord crosses open space, the storage setup is not finished.
Keep Eye Comfort and Dose Control Built Into the Setup

A small room intensifies glare because light reflects off mirrors, glossy closet doors, white walls, and TV screens. Safety guidance from wellness and clinical sources emphasizes following device directions for timing and eye protection. Practical buying guidance also notes that users should follow manufacturer session limits, often around 10 to 20 minutes, and use eye protection with bright devices or face exposure. That advice fits a bedroom because eye protection is easier to remember when goggles live beside the panel.
Place goggles, the remote, and a timer in the same vertical storage zone. A small adhesive bin on the closet wall or a slim hanging pouch works well without taking floor space. If your panel has both red and near-infrared settings, label your preferred routine in the device app or manual instead of guessing each night.
More light is not automatically better. A clinical product review describes a biphasic dose response, meaning too little light may be ineffective while too much may reduce benefit or increase irritation. That is why a tidy storage system should also preserve the correct distance, session length, and angle.
Pros and Cons of Keeping a Panel in the Bedroom

A bedroom setup can improve consistency because it pairs the panel with routines you already do, such as changing clothes, stretching, or winding down. At-home use is often valued for convenience, and wellness sources frequently frame regular use as more realistic when the device is easy to access. The practical win is that you are less likely to skip sessions when the panel is already mounted, plugged in, and ready.
The downsides are glare, shared-room disruption, and clutter if the setup is not planned. A bright panel can disturb a partner, reflect into a mirror, or make the room feel clinical. There is also a safety issue if cords run across walking paths or if a heavy panel is balanced behind furniture.
For recovery and wellness goals, keep expectations grounded. A health forum discussion shows that people often seek red light therapy for muscle recovery, joint discomfort, inflammation, and relaxation, but that kind of user discussion is not the same as a controlled clinical result. Use the panel as a supportive wellness tool, and seek professional care for persistent pain, swelling, eye sensitivity, medication-related light sensitivity, or unexplained symptoms.
A Small-Bedroom Setup That Works

A practical no-floor-space layout looks like this: the panel is mounted on a side wall or closet wall at torso height, the outlet is within reach, the cord runs down the wall in clips, and goggles sit in a slim wall pouch. You stand 6 to 12 inches away if that matches your device manual, start the timer, complete the session, let the unit cool, wipe what needs wiping, and leave the floor clear.
If you rent, choose the least invasive version of the same idea. A closet-wall bracket on a replaceable board, a rated over-door hanger for a lightweight panel, or a vertical shelf with a retaining lip can preserve floor space without turning the bedroom into a treatment room.
The best storage solution is the one that protects the panel and removes friction from your routine. Keep it vertical, stable, cool, dry, easy to reach, and paired with eye protection; then let consistency do the quiet work.


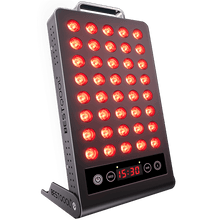
 Small
Small

 Moderate

 Moderate

 Moderate

 Full
Full

