

For post-lifting shoulder and upper back recovery, red light therapy works best as a consistent add-on. Use it on bare skin soon after training, keep sessions short and regular, and choose a device with near-infrared light for deeper muscle tissue.
Does your upper trap, rear shoulder, or shoulder blade area feel tight, hot, or strangely stuck after presses, rows, or heavy pulls? Most people get the best chance of useful results with short sessions several times a week, and many notice a real pattern only after a few steady weeks. This guide covers practical timing, distance, session length, and the signs that light therapy is not the right next step.
Why shoulder and upper back soreness respond differently than skin-level issues
Photobiomodulation uses red and near-infrared light to influence cell activity without heat damage or UV exposure. For lifters, that matters because post-workout discomfort in the shoulder and upper back is usually not just tight muscles. It is often a mix of muscle microdamage, temporary inflammation, local fatigue, and irritated connective tissue around the rotator cuff, rear delts, rhomboids, and upper traps.
Near-infrared light penetrates deeper than visible red light, so it is usually the more relevant setting for the thicker muscles of the upper back and shoulder girdle. Visible red can still help more superficial tissues, but if your pain feels buried under the shoulder blade or deep near the back of the shoulder after lifting, a device that combines red and near-infrared is the more practical choice.
Research on muscle recovery remains promising but mixed, which is the right mindset to bring into this. In practice, that means light therapy may be worth using if you want less next-day soreness, better tissue comfort, or a smoother return to training, but it should not be treated as a guaranteed performance shortcut.
What it can realistically help after lifting
Short-term studies suggest red light therapy may reduce exercise-related stress. If your upper back feels beat up after high-volume benching, pull-ups, barbell rows, or deadlifts, the realistic goal is not instant pain relief. The better goal is to calm the area enough that your normal recovery habits work better over the next day or two.
Some studies on upper-limb muscles found lower delayed-onset soreness, while others found little change in soreness even when lab markers improved. That mismatch matters. You may feel only a modest difference subjectively, yet still recover better between sessions. This is one reason it helps to track whether your next pressing or pulling workout feels less restricted, not just whether you feel dramatically better that same night.
Home devices are generally less powerful than clinic devices, so expectations should stay grounded. A home panel can be useful for the nagging worked-over feeling in the upper traps or rear shoulder after training, but it is less likely to change a true injury with sharp pain, weakness, numbness, or joint instability.
When to use it after a workout
Post-workout use is commonly recommended for recovery support, and that fits shoulder and upper back training well. If you have just finished an upper-body session and the area feels inflamed or overworked, using the light soon after training is a reasonable approach. Many practical protocols place recovery sessions within about 30 minutes after exercise, though the broader research base has not fully standardized an exact post-lift window.
Pre-exercise use may also improve fatigue resistance in some studies, but if your main problem is recovery after lifting, start with after-training sessions first. That keeps the routine simple and lets you judge whether the tool is helping your real problem: how your shoulders and upper back feel later that day, the next morning, and at the next workout.
A common real-world example is the lifter whose upper traps and rear delts are cooked after push day because benching, incline work, and dips all piled onto already tired scapular stabilizers. In that case, using the panel after showering, before dinner, and before the tissue fully stiffens is usually more practical than trying to squeeze in a pre-lift session on a busy workday.
How to set up a shoulder and upper back session at home

Most at-home guidance centers on bare skin, short sessions, and consistent use. For shoulder and upper back recovery, place the panel so it faces the sore zone directly rather than at a steep angle. If the issue is mostly front-of-shoulder tenderness after pressing, treat the front and side of the joint. If the pain sits around the rhomboids or under the shoulder blade after rows or deadlifts, turn so the panel hits the back of the shoulder and upper back squarely.
Typical session lengths are about 5 to 20 minutes per treatment area, with many devices working best at roughly 6 to 24 inches away depending on power. If you do not know your device’s irradiance, the safest practical move is to follow the manufacturer’s distance guidance, start on the shorter end, and increase only if the area tolerates it well. More time is not automatically better because photobiomodulation appears to have a biphasic response, meaning too little may do nothing and too much may blunt the benefit.
Recovery goal |
Practical setup |
Mild post-workout tightness |
5 to 10 minutes over the sore area, 3 to 5 days per week |
Heavier soreness after hard upper-body training |
10 to 20 minutes over the area, usually after training and again on the next recovery day if needed |
Broad upper back fatigue |
Use a panel large enough to cover both shoulder blades and upper traps, or split the area into two short passes |
A simple example helps. If your left rear shoulder and upper trap are the main complaint after heavy dumbbell pressing, do not waste the whole session shining light at your chest. Put the panel directly on that side, expose the area, stay within the device’s recommended range, and keep the dose focused where the tissue is actually irritated.
How often to use it, and when to expect results
Regular use matters more than one long session. For most home users, three or more sessions per week is a reasonable starting rhythm, especially during a heavy training block. If your shoulders are getting loaded four days a week between pressing, pulling, and accessory work, using light therapy only once every 10 days is unlikely to tell you much.
Noticeable changes often take about 2 to 4 weeks of regular use, which is important because many people quit too early. The pattern to watch is whether your soreness fades faster, your warm-up sets feel smoother, or you need less compensating shrugging and guarding when you reach overhead after training.
The easiest way to test whether it is helping is to compare one month of training with it against one month without it while keeping the rest of your recovery habits stable. If your soreness after upper-body days drops from lingering for two days to clearing by the next morning, that is a meaningful practical win even if the change feels subtle from session to session.
What red light therapy can and cannot replace
Red light therapy works best alongside standard recovery habits. It will not make up for poor sleep, not eating enough protein, sloppy load management, or pressing through bad shoulder mechanics. If your bench setup keeps dumping stress into the front of the shoulder, light therapy may calm symptoms while the real driver stays in place.
In practical terms, a good recovery plan usually includes enough sleep, smart exercise selection, hydration, and a short light session after lifting. The device is the support layer, not the foundation.
This is especially true for upper back complaints that are really technique problems in disguise. If your traps are always locked up after lateral raises and overhead pressing, you may be overusing them because your scapula is not moving well or your programming is too dense. Light can help the tissue settle, but it cannot coach better movement.
Safety, downsides, and when not to push through
Short-term use appears low risk when devices are used correctly, but eye protection and directions matter. Do not stare into the light. Do not assume a stronger or longer session is always better. If the device feels irritating, dries the skin, or leaves the area unusually reactive, reduce time or increase distance and reassess.
FDA clearance mainly reflects basic safety and marketing status. That is one of the main drawbacks of shopping for a device at home. Another is cost. A modest home device may be enough for one shoulder, but if you want to treat the whole upper back efficiently, panel size and price rise quickly.
Red light therapy should not be treated as a fix for structural injuries. If your shoulder pain includes sharp catching, major weakness, pain that wakes you up, numbness down the arm, or obvious loss of range of motion, stop self-managing and get the area assessed. That is even more important if symptoms followed a specific lift and felt like a tear or pop.
A practical bottom line for lifters
The strongest practical case for red light therapy is as a support tool, not a cure-all. If your shoulders and upper back get repeatedly cranky after lifting, use a red and near-infrared device on bare skin, keep sessions short, stay consistent for a few weeks, and judge success by better recovery between workouts rather than hype.
The most useful routine is usually the simplest one: treat the sore area soon after training, repeat it several times a week, and keep doing the basic recovery habits that actually move the needle.


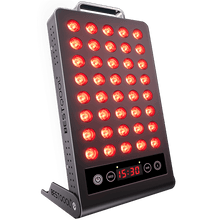
 Small
Small

 Moderate

 Moderate

 Moderate

 Full
Full

